In this guide:
- About archiving
- Step 1 – Download Collaborate recordings
- Step 2 – Ensure your site is provisioned with Moodle
- Step 3 – Create archive folders in Panopto
- Step 4 – Upload Collaborate recording to Panopto
- Step 5 – Find an archived recording
About archiving
Blackboard Collaborate ULTRA recordings, which capture live, online teaching sessions can be easily accessed and viewed via Moodle. However, UAL’s license agreement with Blackboard includes a limited amount of storage for the retention of recordings.
If any of recordings need to be retained they must be transferred to Panopto.
Staff will retain access to recordings made and stored in Collaborate in the standard undergraduate academic year previous to their current year they are teaching. Recordings before this period will be deleted once per year on the 1st October.
Example: on 1st October 2022 we will delete all recordings made prior to 1st October 2021.
Therefore, these recordings must be archived by transferring them to Panopto if they are needed at a later date.
Watch the video guide:
Step 1 – Download Collaborate recordings
Download recordings from Moodle
- Open your Moodle site.
- Find the Collaborate recording you want to download:
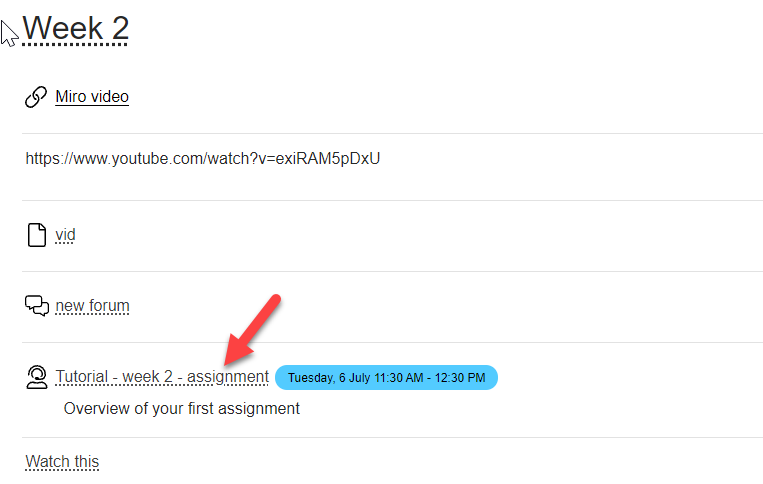
- Select the Download Recording icon (usually to the right of the recording’s title and timestamp):
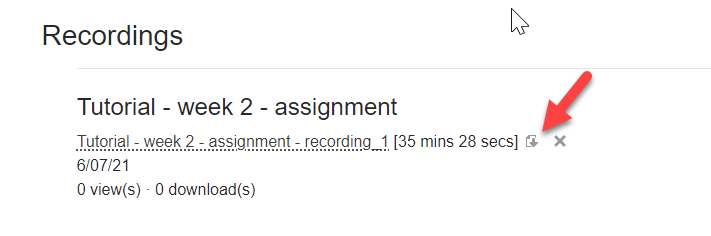
- The recording will download to the Downloads folder on your pc/laptop or to another selected folder you have chosen. You may also want to change the name of the Collaborate file so that it accurately reflects the content of the recording.
Step 2 – Ensure your site is provisioned with Moodle
You need to ensure your Moodle site is provisioned (connected) with Panopto. On a desktop browser, the Panopto block appears in your Moodle site in the right sidebar.
If Panopto has already been provisioned, the block will likely include a list of recordings and a link to the Course settings. If it has not, follow the steps in Provisioning Panopto in Moodle guide:
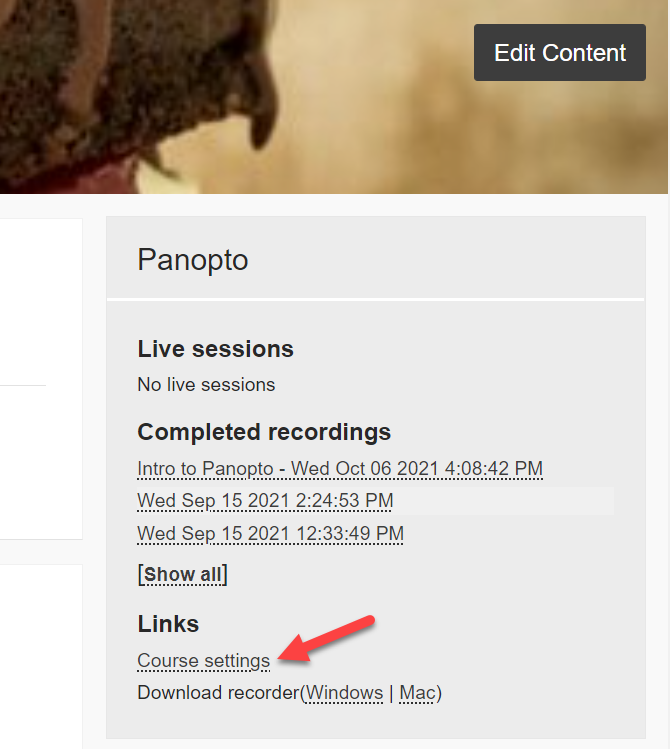
The most direct way of accessing Panopto is to select Course settings from the Panopto Block. This direct you to the Panopto folder linked to the Moodle site. (A window will open that you can close this window by selecting ‘X’).
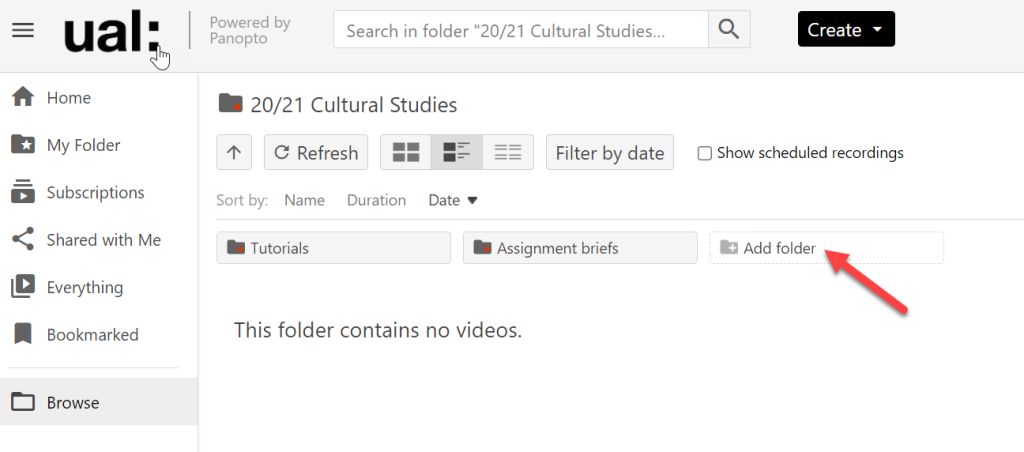
Step 3 – Create archive folders in Panopto
Once the folder is open you may want to create sub-folders to store your archive recordings. This will make it easier to find these recordings at a later date.
Add a subfolder:
- Select Add folder.
- Enter a relevant name like Tutorials or Assignment briefs.
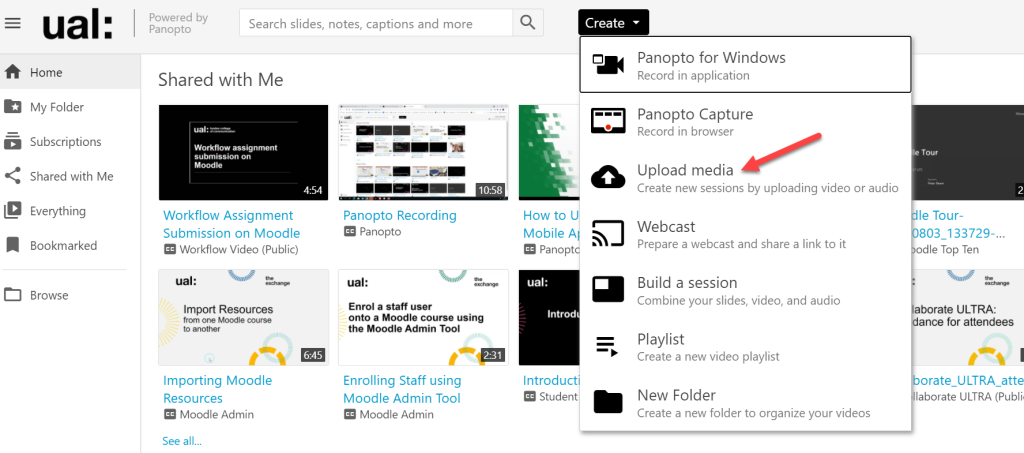
Step 4 – Upload Collaborate recording to Panopto
After completing step 3 (if needed), you can now upload your recordings to Panopto. Uploaded recordings will stay permanently on Panopto. There is no file size limit for these recordings.
- Select the Create button.
- From the drop down menu, select Upload media.
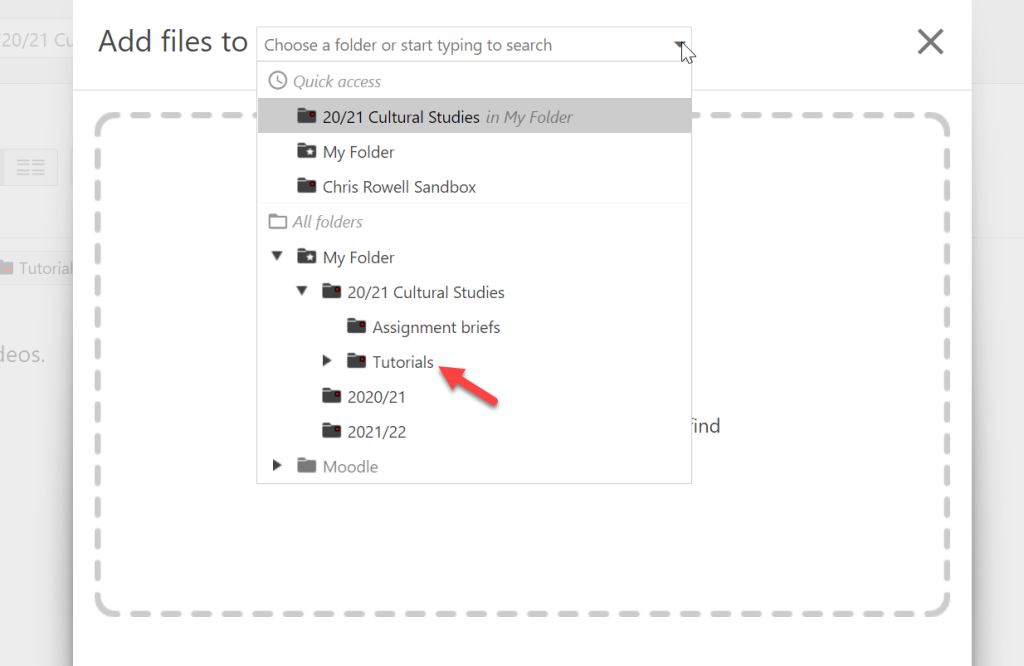
- The next window will give you the option to upload the Collaborate recording file to the correct Panopto folder.
- Next to Add files to, enter the name of the folder you are looking for. In the drop down menu, the sub-folders that you have created will be listed there.
- Select the appropriate folder:
- Drag and drop your saved Collaborate recording from its saved location on your device (as noted in Step 1 above).
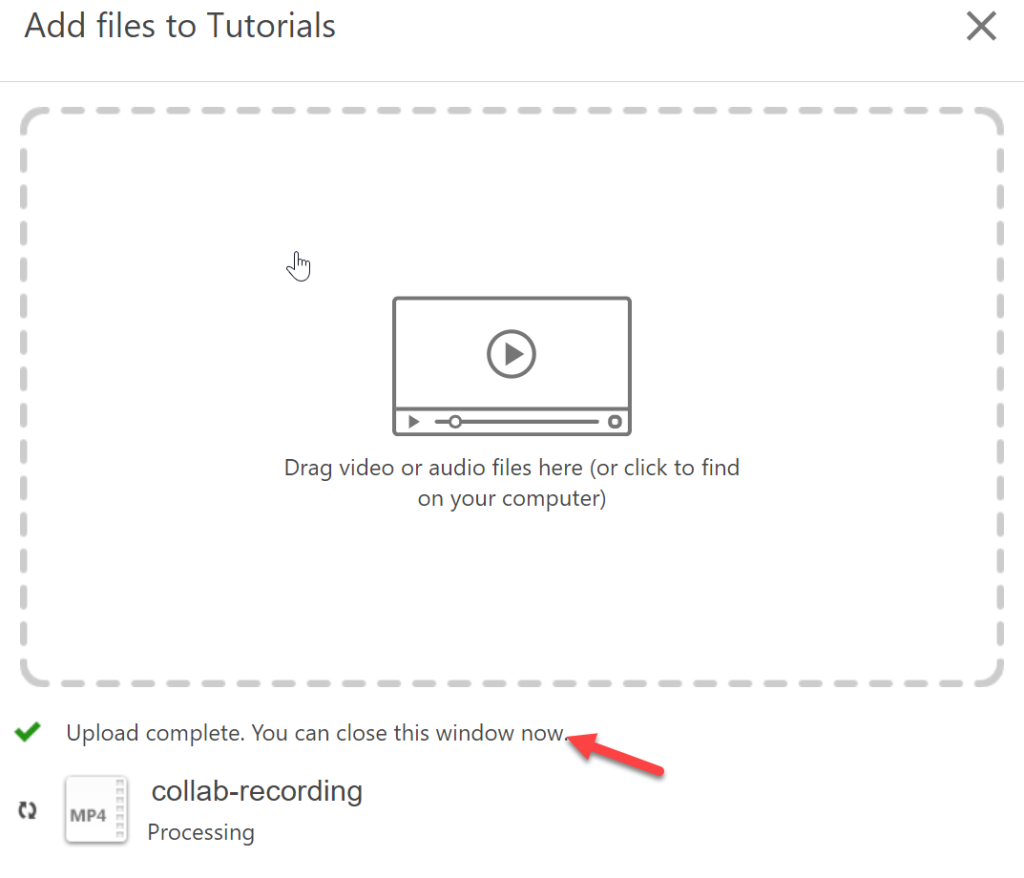
- When the upload is complete, a green tick icon will appear with the message: Upload complete.
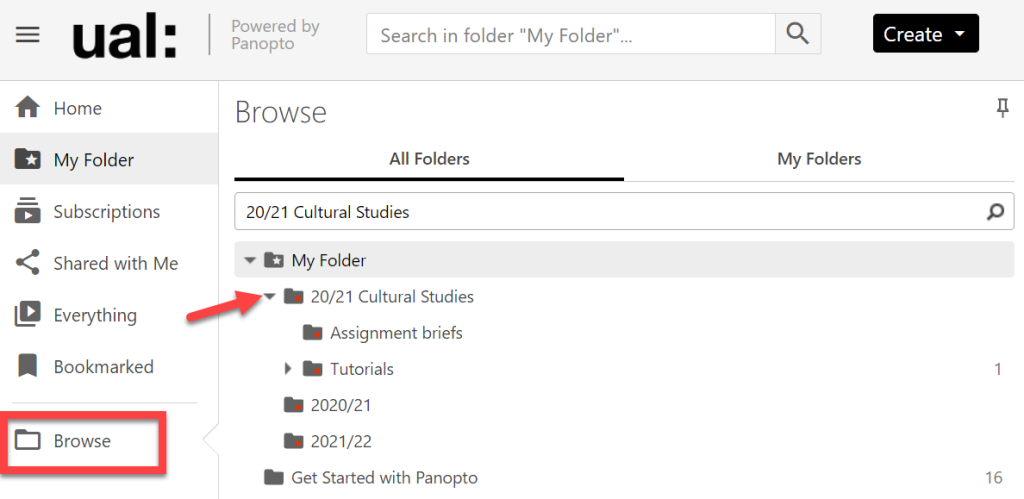
Step 5 – Find an archived recording
- Open Panopto through your Moodle site or directly on Panopto
- In the sidebar of the Panopto dashboard, select Browse.
- Search for the folder where you have stored the Collaborate recording. If you created subfolders, these can be opened by selecting the arrow next to the name of the folder.