In this guide:
Create a new board
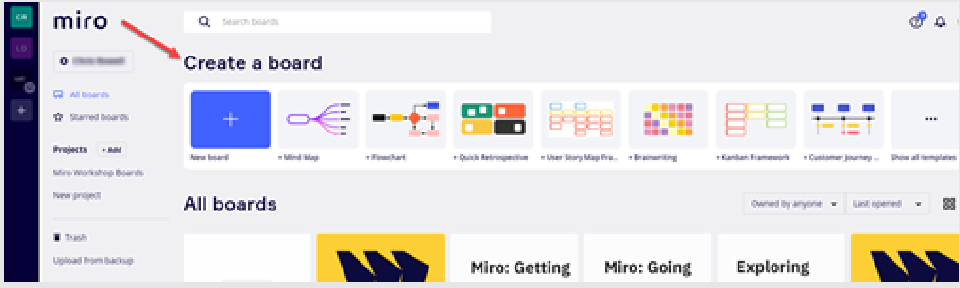
After you have created your account, you can access the Miro dashboard. Use the dashboard to navigate between your accounts, teams, projects and create a new board.
Select the +New board icon to create a new board or choose one of the pre-existing template boards:
Board features
In your Miro board, there are features that will help you build the learning activities:
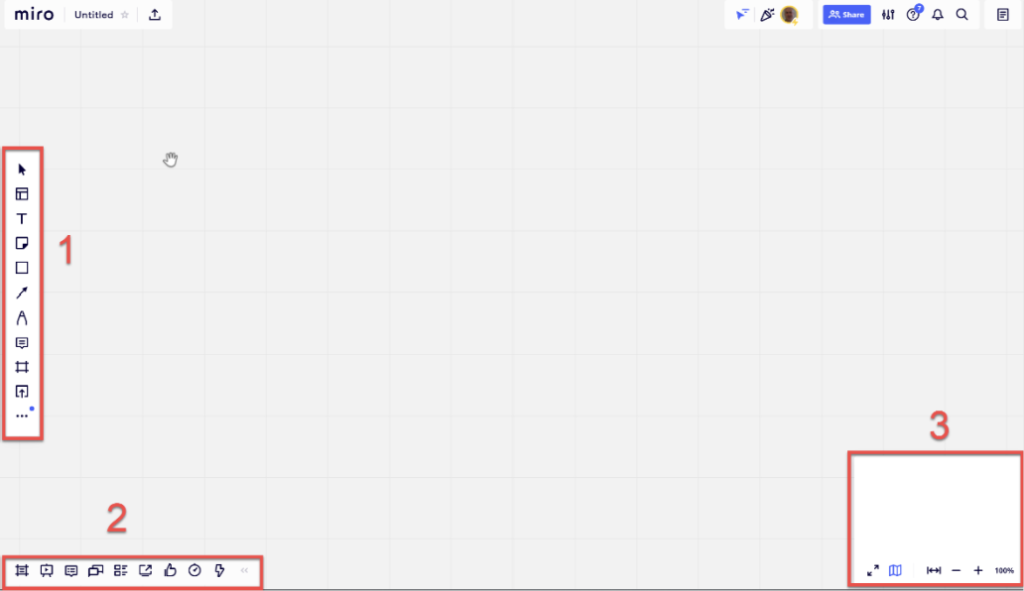
- Main Toolbar: add content like text, comments, frames, shapes and stickies
- Collaboration Toolbar: use frames, chat, screen sharing, timer, presentation mode, voting and video chat.
- Navigation Toolbar: zoom in and out and go to full screen mode
Navigating a board
There are three modes of board navigation — Mouse, Trackpad, and Touchscreen.
Adding content
Select one of the tools from the main toolbar:
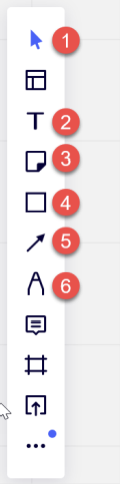
- ‘Select/hand’ is the key tool for navigation.
- Add text
- Add sticky notes
- Add shapes
- Add connection lines