Introduction to Turnitin (Feedback Studio)
Feedback Studio is Turnitin’s assessment tool. Whilst commonly used for summative assessment submissions, Feedback Studio can also be used for formative assessment too. Feedback Studio supports ungraded assignments, and includes tools for adding text markup and in-text commentary, assessing via grading sheets and rubrics, as well as for providing feedback summaries and audio feedback to students. Feedback studio also supports peer assessment using its built-in PeerMark tool.
Feedback Studio assessments can be created in Moodle using the Feedback Studio activity. This will create a submission point for students that can make use of Turnitin’s plagiarism detection tools.
Setting up a formative assessment in Turnitin (Feedback Studio)
To add a Feedback Studio activity to Moodle:
- Switch Edit mode on
- Click Add activity or resource within your Moodle page
- Select Turnitin (Feedback Studio)

In the Feedback Studio General settings:
- Add in a title for the submission point
- Include an optional summary of the assignment
- Set the relevant options for how you’d like your assignment to behave
Under Grade option, set the Grade to None.
Under Assignment Part 1, set the following:
- Start date: when the assignment opens
- Due date: when the assignment closes
- Post date: when feedback will be released
Under Similarity Report Options set:
- Report Generation Speed: Generate reports immediately, students can resubmit until due date
- Store student papers: No repository
- This prevents student work from being added to Turnitin’s archive for plagiarism checking. Important for formative work not to be added if it is to be assessed later.
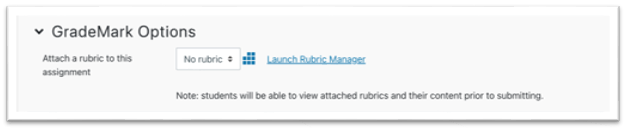
If using a rubric, this can be added to the assignment using the Grademark Options section.
To finish setting up Feedback Studio click Save and display
Using Turnitin (Feedback Studio) for formative assessment
Providing Feedback
Feedback studio contains markup options for providing in-text feedback within documents, as well as a field for general feedback.
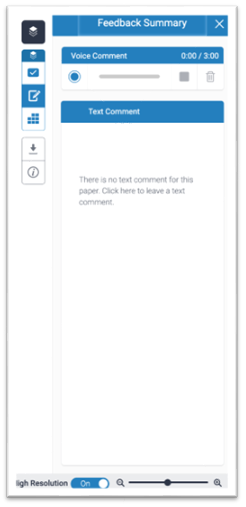
General Feedback
General feedback can be given to students using the Feedback Summary pane on the right-hand side of the Feedback Studio interface. Feedback included in this format will appear to students as an overall feedback summary.
Specific Feedback
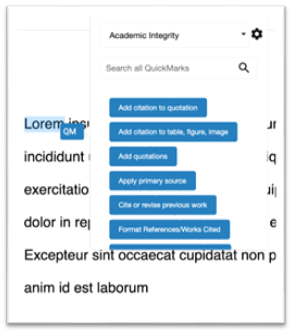
Feedback can also be provided to students inside the assessed document using in-line comments and Feedback Studio’s own QuickMarks.
Quickmarks come pre-populated within Feedback Studio, providing short reference points for common areas of feedback. These can be edited to include personal feedback points, which will subsequently move with a tutor throughout their Feedback Studio assessments.
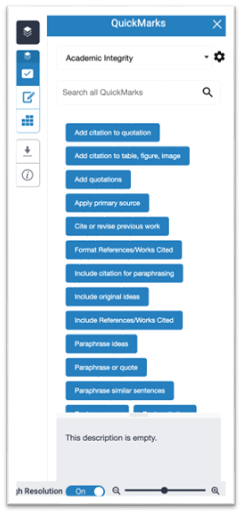
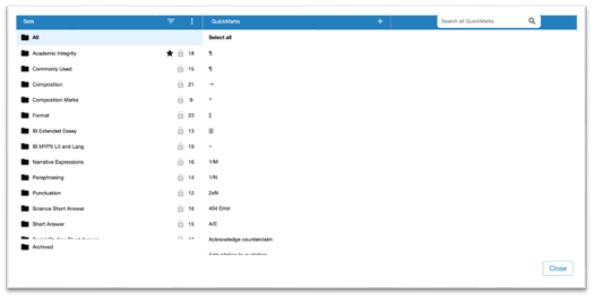
QuickMarks can be accessed in the right-hand pane of the Feedback Studio interface. Click the QuickMarks button for an overview. The dropdown menu provides filtering for built-in categories. Click the Settings button to create new QuickMarks or to edit existing ones.
In-text feedback
In-text feedback can be linked to text markup, providing a quick way to highlight content with attached feedback for students.
Highlight text within Feedback Studio to get started.
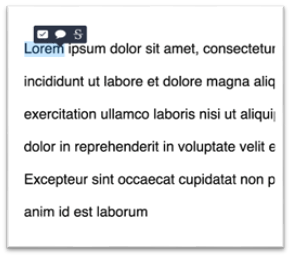
Quickmarks
Click the checked box to access QuickMarks within the text. These are appended to highlighted text for students to see.
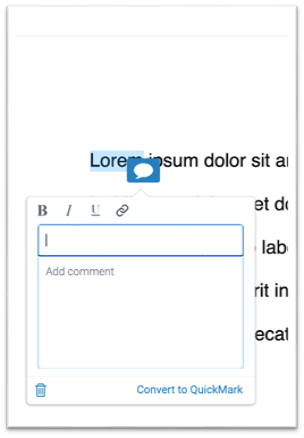
Comments
Click the speech bubble to add your own written feedback. This appears as an attached comment for students to view.
- Comments can also be converted to QuickMarks, making it easier to include any repeated elements of feedback.
Using ungraded rubrics
Ungraded rubrics can be attached to submission points for Feedback Studio. These enable criteria-specific feedback to be given to students.
In Feedback Studio’s rubric manager, rubrics can be created, edited, uploaded and shared with others. Rubrics are linked to your Feedback Studio user account. Any saved rubrics will be available across Moodle courses when creating Feedback Studio activities.
Creating a rubric
To create a rubric:
- Open the Feedback Studio activity
- Click Open Course menu, then click the Settings tab
- Scroll to the section Grademark Options
- Click Launch Rubric Manager
In Rubric Manager:
- Click the Menu button, then Create new rubric
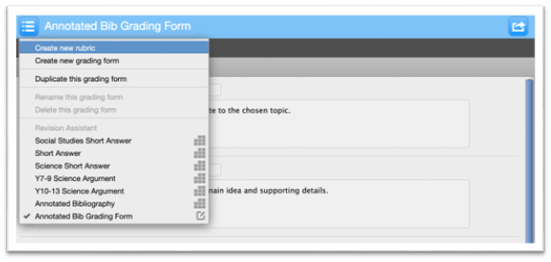
- Select Qualitative rubric in the scoring options at the bottom of the page
- Then enter a name for your rubric
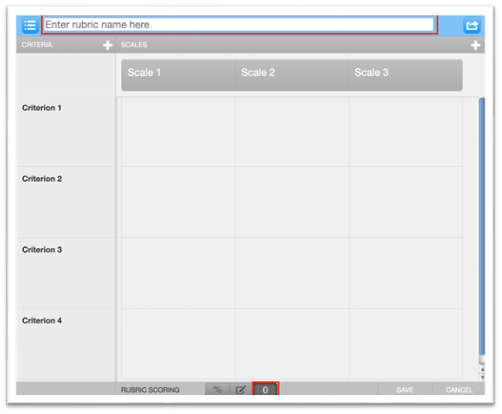
You can now begin to define your rubric:
- Criteria columns can be added and removed, along with scale rows. Use the Add buttons on rows and columns to add further scale or criteria elements. Delete elements using the trash can inside each header.
- Select each cell to enter a definition/feedback for each element of the rubric
- When your changes are complete, click Save
Adding rubrics to a Turnitin (Feedback Studio) activity
To add your completed rubric to your Feedback Studio assessment:
- Return to Feedback Studio settings
- Scroll to GradeMark Options
- Click the rubric dropdown menu
- Select the name of your rubric, this will now be attached to your Feedback Studio assignment

Using rubrics in Turnitin (Feedback Studio)
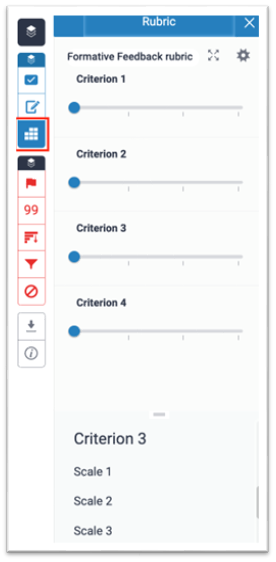
Click the Rubric/Form button in Feedback Studio to access your attached rubric. Each criterion can be assessed against using the slider to move through the relevant scales. This will attach the feedback for the specific point in the scale to the criterion.
Using the similarity report
Students can be given access to their similarity reports through Feedback Studio. Access can be given either with the release of grades and feedback, or as soon as students make a submission.
To allow students to view their reports prior to the release of assignment feedback and grades:
- Open the Feedback Studio activity
- Click Open course menu, then Settings
- Scroll down to Similarity Report Options
- Set Report Generation Speed to Generate Reports Immediately
- This setting has two options, one which accepts only a student’s first submission, the other allows students to resubmit as many times as they like until the submission date.
To retain similarity reports until grades and feedback are released:
- Open the Feedback Studio activity
- Click Open course menu, then Settings
- Scroll down to Similarity Report Options
- Set Report Generation Speed to Generate Reports on Due Date
Sharing feedback with students
Feedback Studio will release grades and feedback automatically. This can be set using the post date of the assignment. At the specified date and time feedback will be released.
To set or adjust the post date of the assignment:
- Open your Feedback Studio activity
- Click Open course menu, then Settings
- Scroll down to the Assignment section
- Set the option Post Date to your desired date and time
- Note: This can be brought forward to release feedback early
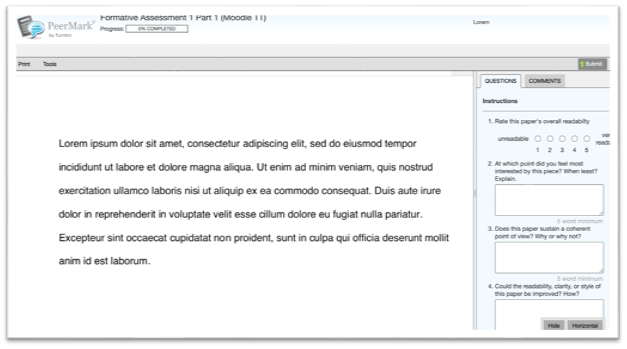
Using Peermark in Formative Assessment
Feedback Studio’s Peermark assessment tool allows students to give peer feedback to work uploaded in Feedback studio.
Peermark can manage allocating assignments to each student, set questions for students to provide feedback on, as well as give students the opportunity to include direct feedback within each other’s work.
Setting up PeerMark
To set up a PeerMark for your Feedback Studio assignment:
- Open your Feedback Studio activity
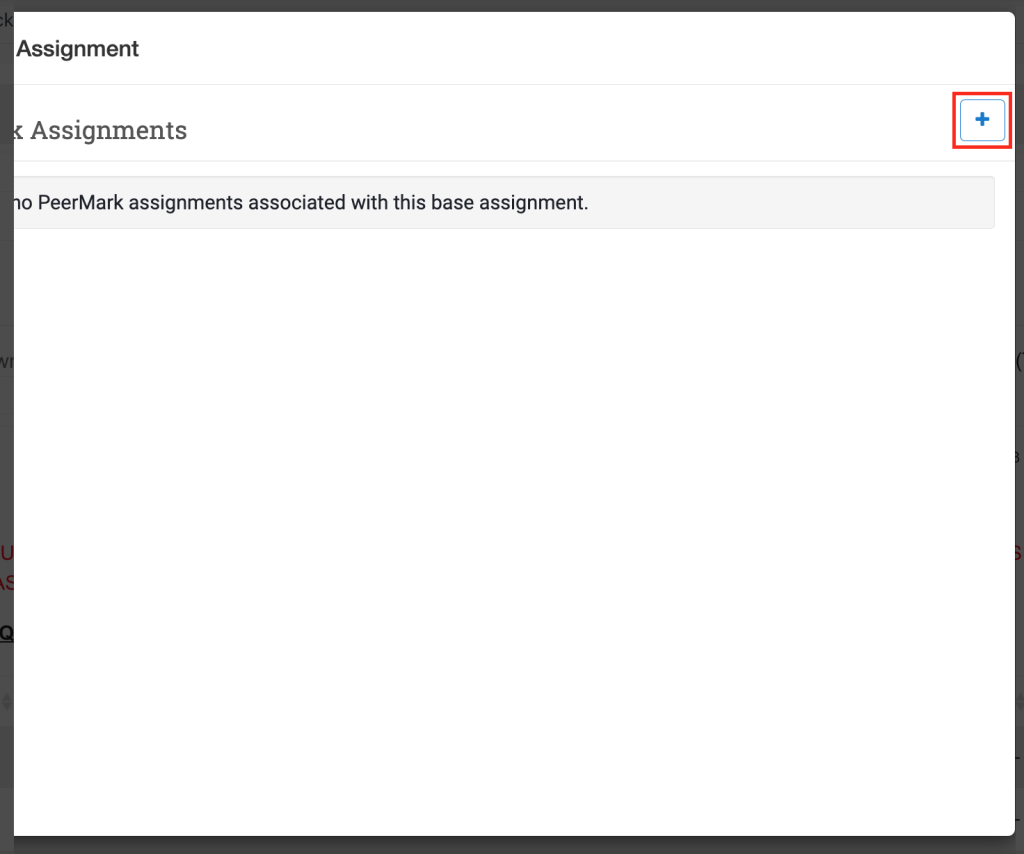
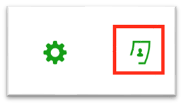
- Click the Launch PeerMark Manager button (green cog)

This will open the PeerMark manager window. To get started, you’ll first need to attach a PeerMark assignment. In the PeerMark assignment window, scroll right and click +.
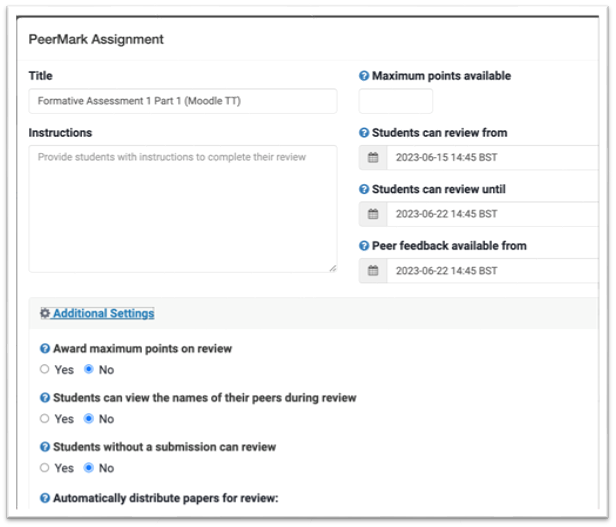
You can now set up your PeerMark Assingment:
- Give your assignment a title
- Provide instructions for students
- Set the timeframe for students to complete their work
You’ll find further options under Advanced settings:
- Set options for anonymous review
- Control paper distribution. This sets how many papers each student can review and whether they are randomly assigned
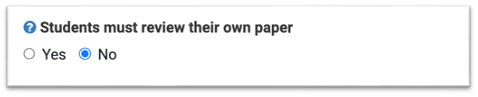
Students can review their own paper.
Using this option, students will review their own paper within Feedback studio using pre-defined prompt questions. This will prevent direct peer review by other students.
Once you’ve finished configuring your PeerMark assignment click Save & continue
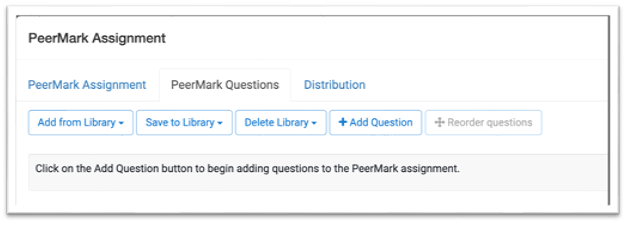
Peermark Questions:
Add prompt questions from a library of pre-defined questions using the Add from Library button. Write your own questions using the Add Question button.
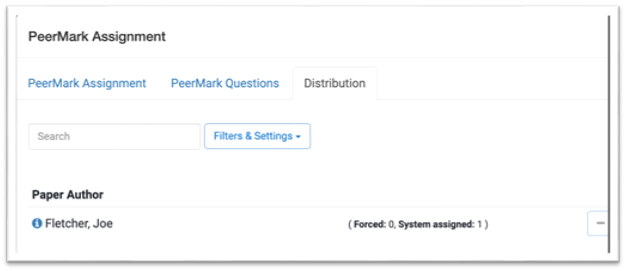
Distribution:
The Distribution tab shows a table of students in the PeerMark assignment, plus their relative paper assignments. This can be amended within the table, increasing or decreasing the papers required.
Using PeerMark
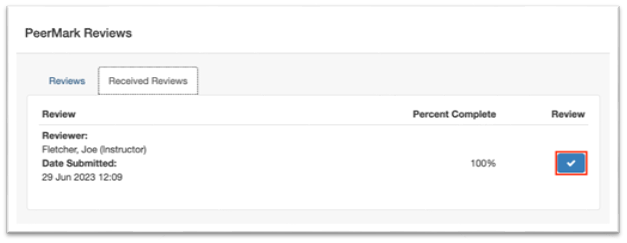
PeerMark reviews are accessed through Feedback Studio. Click the PeerMark Reviews button to get started.
This will open the PeerMark reviews window. Here you will find an overview of each student, including a breakdown of the reviews they have received and the reviews they have given.
- Click the Submitted column to view reviews created by a student
- Click the Received column to view reviews of a particular student’s submission

To review a particular student’s feedback, click the relevant Submitted or Received column, then click the Review option against the corresponding reviewer.
This will open the review in the PeerMark review editor.