In this guide:
Create a new blog
When you want to create a new blog you need to:
- Log into your account
- In the admin bar, go to My Sites
- Select Create New Site
Follow the instructions on the set up form:
- Add a blog URL. You cannot change the URL later.
- Add a title for your blog. You can change this any time.
- Select Create Site.
Choose a blog theme
A theme is your blog’s design. It includes the font styling, the colours, the page layouts and more. When you create a new blog, a default theme is assigned, but you maybe change your blog’s theme at any time.
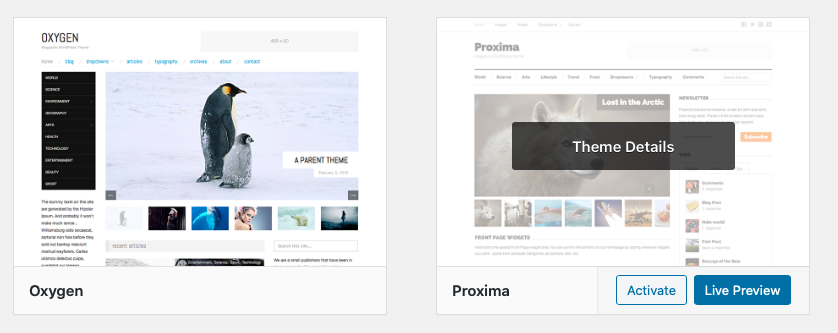
To choose a theme:
- Go to your blog’s dashboard
- From the Navigation menu, select Appearance option
- Select Themes to browse the available themes.
- Select Live Preview to preview how the theme would look on your blog.
- Select Activate to apply the theme to your live blog.
Customise
- From the Navigation menu, select Appearance, then Customise.
- A new tab may open and you can make live updates using the available options, usually in a left sidebar.
- Select Save & Publish to apply your changes to the live site.
Widgets
Widgets are independent sections of content that can added to your theme. Examples of widgets include a Calendar, RSS feed and a Twitter feed.
Depending on the theme, they can appear on the right/left-hand side of your blog or at the bottom. Many themes show some sidebar widgets by default until you edit your sidebars.
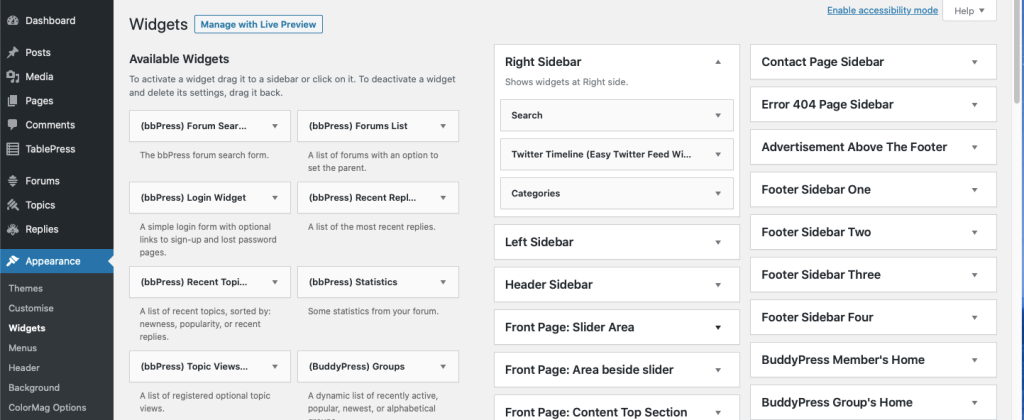
Adding widgets to your site:
- From the Navigation menu, select Appearance, then Widgets. The available widgets section lists the widgets with a brief description. You can use widgets more than once.
- Drag and drop the title bars into the desired area. If you are using the Accessibility Mode, you can use the Add and Edit buttons.
- Select the widget’s title bar to open and configure the settings.
- Select Save to apply the widget to your live site.
- Select Delete to remove a widget.
Inactive widgets
If you want to remove the widget but save its setting for future use, drag it into the Inactive Widgets area. You can add them back anytime from there. This is especially helpful when you switch to a theme with fewer or different widget areas.
If you switched themes and are now missing some widgets, go to the Inactive Widgets area. This is where all your widgets and their settings are saved.
Menus
A menu is how a visitor will navigate your site. Each navigation menu may contain a mix of links. This can be links to pages, categories, custom URLs or other content types.
Menus can appear in locations defined by your theme. They can also be used in sidebars by adding a “Navigation Menu” widget on the widgets screen.
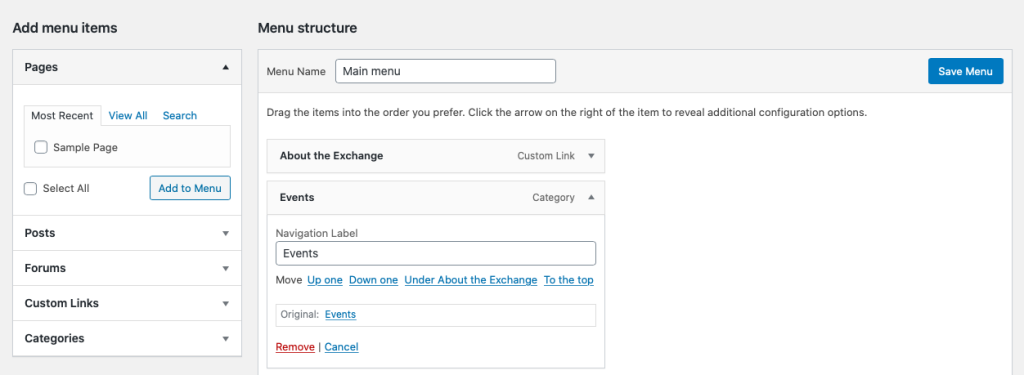
- From the Navigation menu, select Appearance, then Menus.
- To edit an existing menu, choose a menu from the drop down. If you haven’t yet created any menus, select ‘create a new menu’.
- Under Add menu items, tick the items you want to appear and select Add to Menu.
- Once you have added items to the menu structure, drag and drop items to reorder them.
- Drag or move a menu item a little to the right to make it a submenu. This will appear as a drop-down menu on your site.
- Delete a menu item by expanding it and selecting Remove.
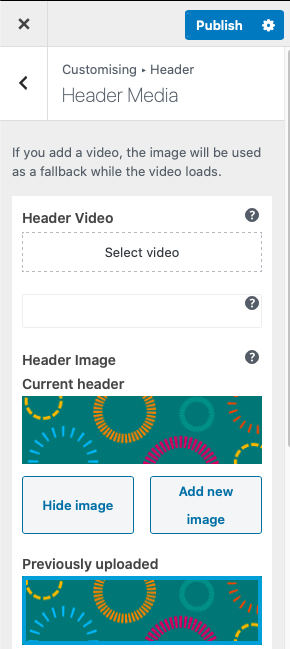
Header
A header image or video appears horizontally across the top of your site. You may wish to add one to provide visitors with visual information about your site.
- From the Navigation menu, select Appearance, then Headers.
- The customise menu will open. Depending on the theme you have selected, you may have several available options to edit.
- In Header Media, add a header image or video.
- Select where you want to display it on your site.
- Select Publish to apply the header to your live site.