Overview
Scheduler allows you to set up bookable appointment slots in Moodle. These can be configured for individual students or linked to Moodle course groups. The scheduler tool allows you to manage and track student bookings, as well as distribute appointments across multiple course team members. Reminders can be sent to students, there are options for students to upload work in advance, plus students can cancel and re-book appointments.
Adding a Scheduler to Moodle
To add a Scheduler activity to your Moodle page:
- Turn on Edit mode
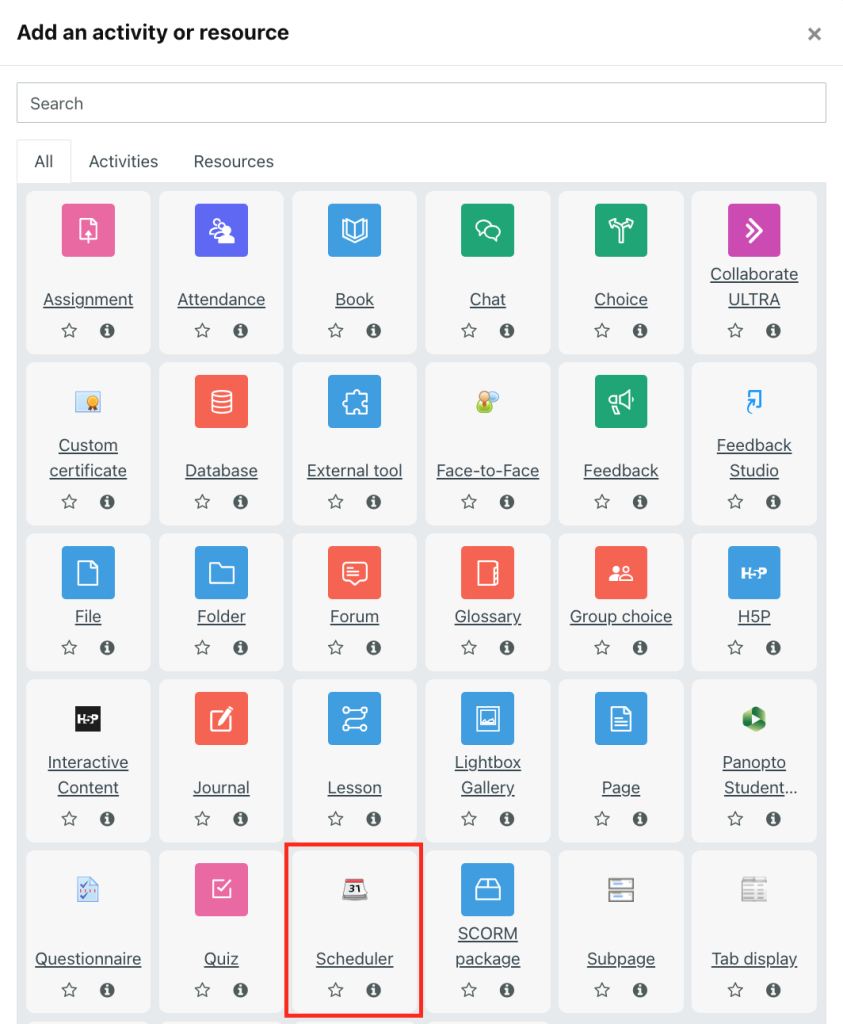
- Click Add activity or resource
- Click Scheduler
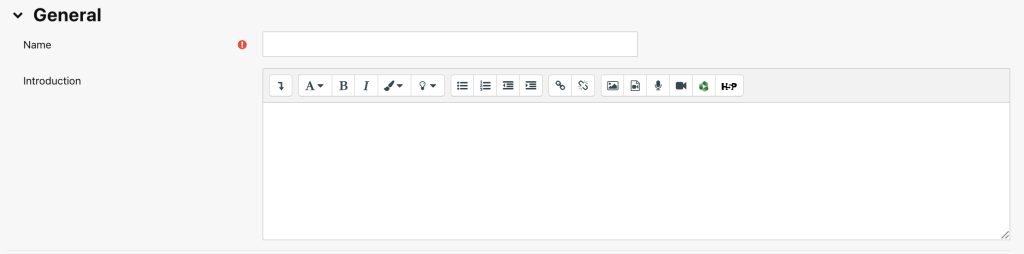
Under General, provide a Name and Description
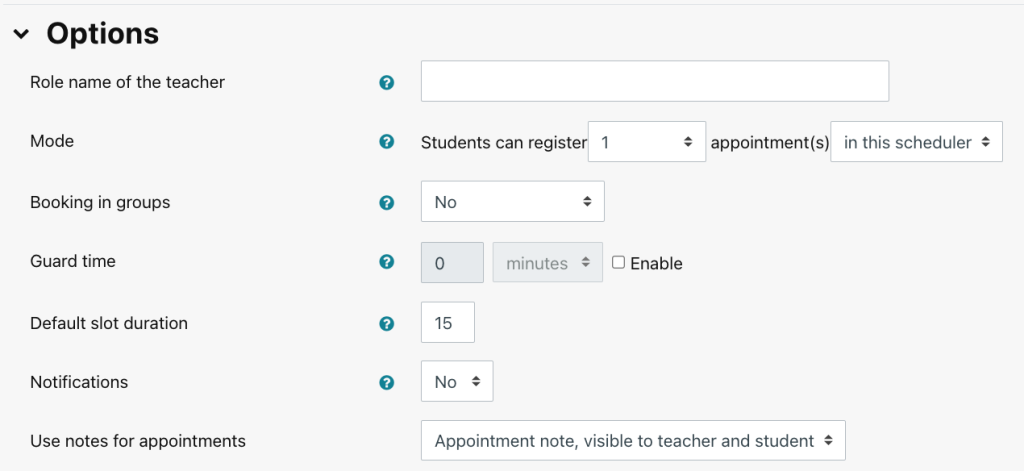
Under Options:
- Set Mode for the default number of bookable appointments for students
- Choose whether to enable Booking in groups
- Add a Default slot duration.
- Choose whether students should receive notifications.
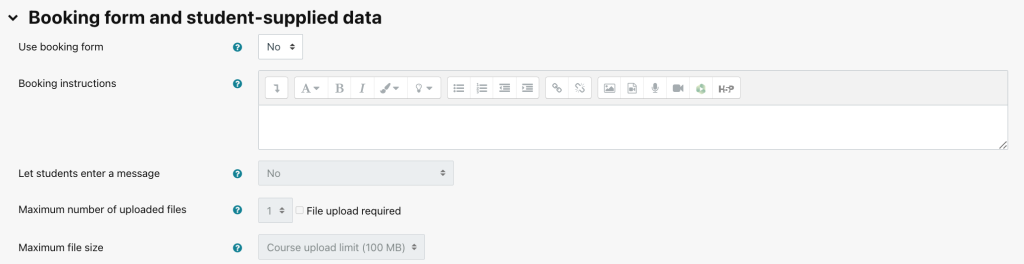
Under Booking form and student-supplied data:
- Choose whether to Use booking form
- Add Booking instructions
- Use Let students enter a message to set a compulsory or optional message
- Set a file upload limit, and choose whether this is required
Click Save and display
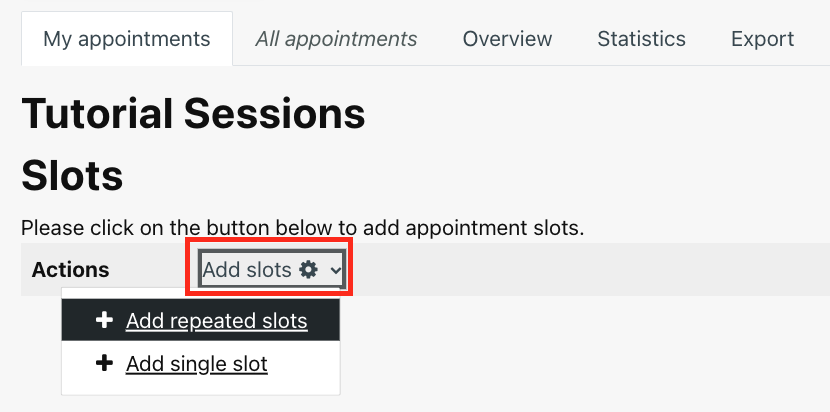
Creating appointments
Open the Scheduler activity from your Moodle page to begin creating appointment slots:
- Click Add slots
- Choose whether to Add single slot or Add repeated slot
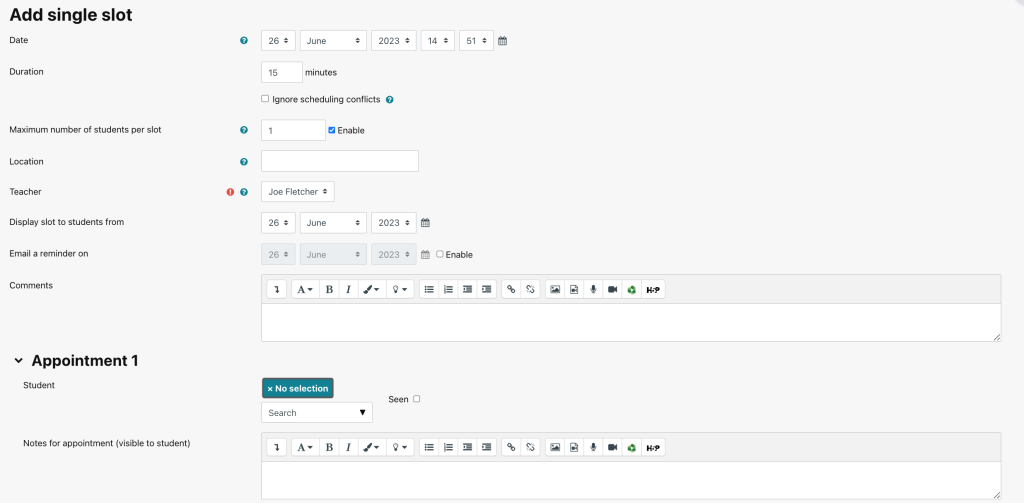
Adding single slots
- Set Date, Time, Duration
- Add the Maximum number of students per slot
- Assign a Teacher, this list is populated by users with teacher status in the Moodle page
- Set when slot is available to book using Display slot to students from
- Set an optional email reminder and add any Comments
- Under Appointment 1, leave open for bookable slot, or set to specific student.
- Click Add another student to create another appointment slot
- Click Save changes once all updates have been made
Adding repeated slots
- Set Date
- Set repeated appointments using Repeat time stots until
- Check each day which you’d like to Add appointments on
- Set Time range for slots to be booked into
- Set slot Duration
- Choose whether to schedule Break between slots
- Use Force when overlap to change the behaviour of overlapping appointments
- Set Maximum number of students per slot
- Assign a Teacher from the dropdown list
- Set a date to Display slots to students from
- Choose whether to Email a reminder
- Click Save changes

Managing scheduled appointments
To manage appointments in your scheduler, open the schedular activity from your Moodle page. Use the options below to move, update or remove appointments:
- My appointments tab shows slots assigned to you
- All appointments shows every slot within a Moodle page
- Overview allows filtering of appointments by user
- Statistics gives a breakdown of course information at a general level, as well as at a student or teacher role level
- Export allows appointment schedules to be downloaded as a file for use outside of Moodle (including Excel, pdf, csv)