This guide will explain in detail how to use the Moodle Admin Tool functionalities, and permissions.
Accessing the Admin Tool
1 .To access the Admin Tool, login to your Moodle dashboard
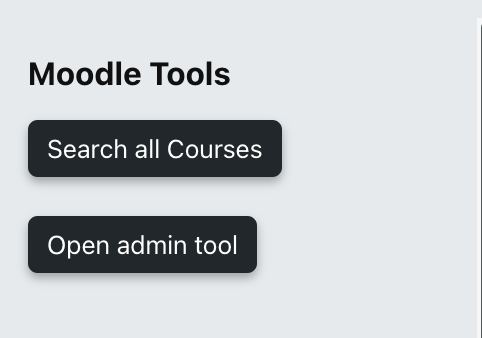
2. In Moodle Dashboard on your right-hand side click on the open block drawer

3. In the Moodle Tools block click on the Open Admin Tool.
Functionality and permissions
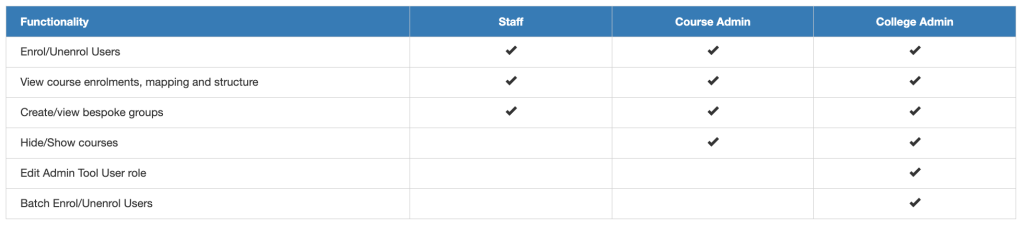
There are three defined roles in the Moodle Admin Tool:
- Staff;
- Course Admin;
- College Admin.
The below chart explains permissions for each role (also, the functionality table is displayed on the Moodle Admin Tool front page):
Differences between student and staff enrolment
Students are added to the courses via SITS, by adding a record to the student account. When the record is created then data is moving across to Moodle during the twice a day system syncs.
However, there is no such system for staff members; they will need to be added manually via the Admin Tool. To add a staff member to the course in Moodle please refer to the User Enrolment guide below.
User enrolment
In order to enrol a staff user, locate your course first and then you can add user to it. To do this follow these steps:
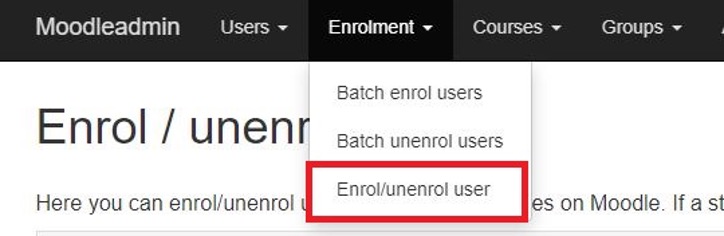
1 .Click Enrol/unenrol user under Enrolment.
2. Type Course ID/Title and Academic Year.

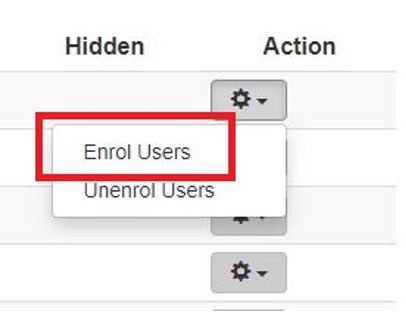
3. Click the action icon and select enrol users.
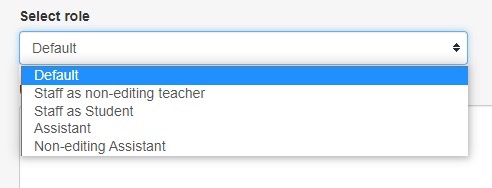
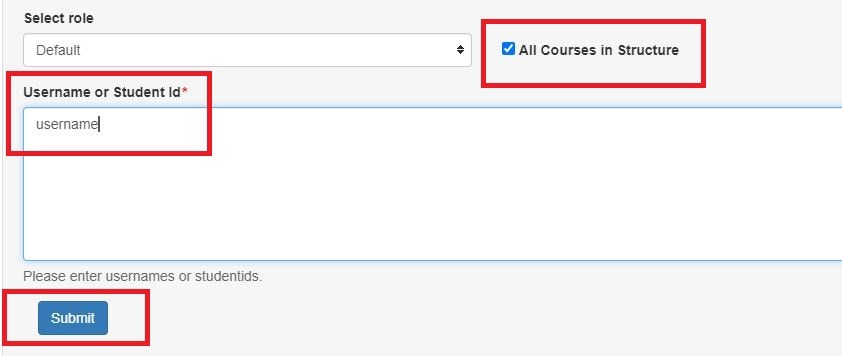
4. Select the user role. The default option will give the user the same rights as already has on the other courses.
5. Check all courses in structure if required, insert usernames and click the submit button.
6. Enrolment successful should appear
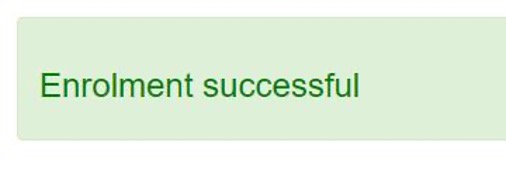
Note that if a banner appears suggesting that the user cannot be enrolled and then lists courses underneath, this means that the user is already enrolled on those courses.

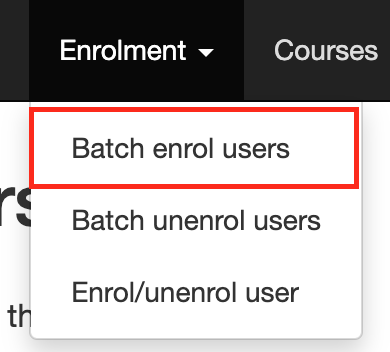
Batch enrol user
You can enrol a group of users at once to the course or courses, to do so follow the instructions below:
1. Click Batch enrol users under Enrolment.
2. The next step is to create an Excel spreadsheet with three columns, make sure that there is no space in between:
- Column A: COURSEID
- Column B: USERNAME
- Column C: ROLE

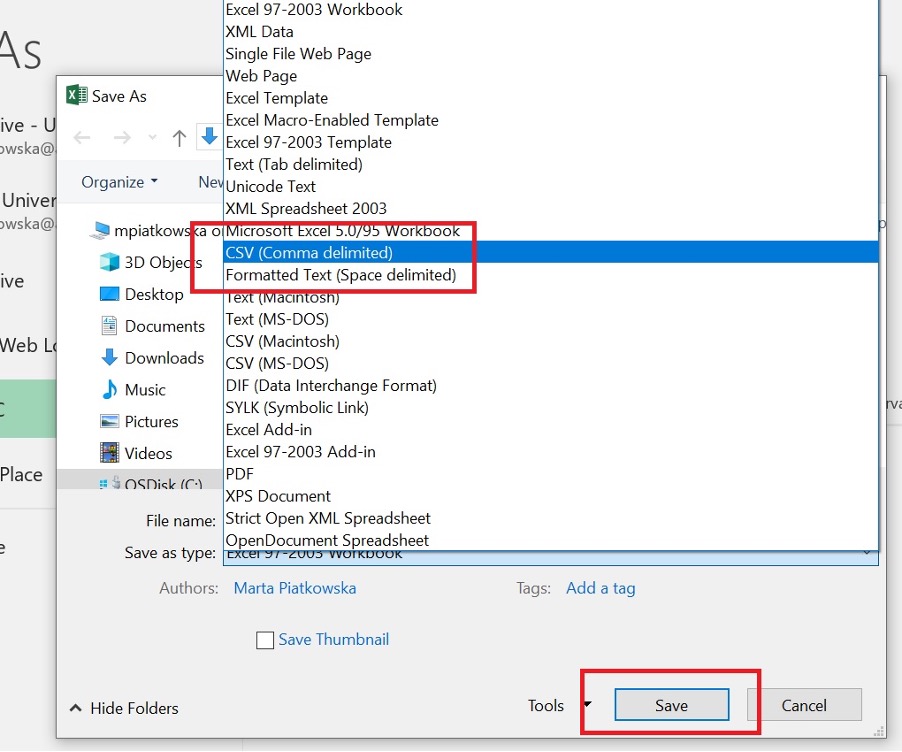
3. Once the spreadsheet is ready save it as a CSV file.

4. Upload the spreadsheet by clicking on Browse and click Submit.

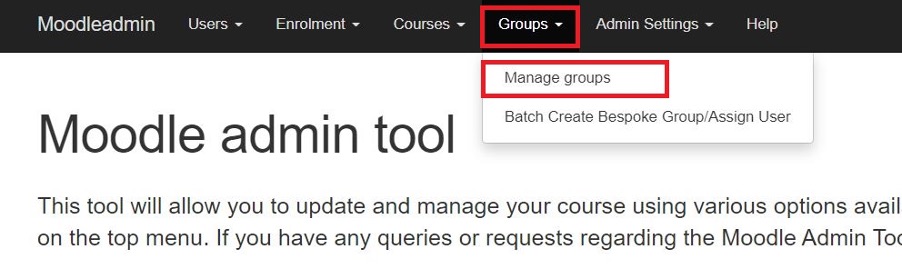
Single group creation
A single group can be created within a few clicks. Please be aware that it can take up to 24hrs for this to process. Follow the instructions below for single group creation:
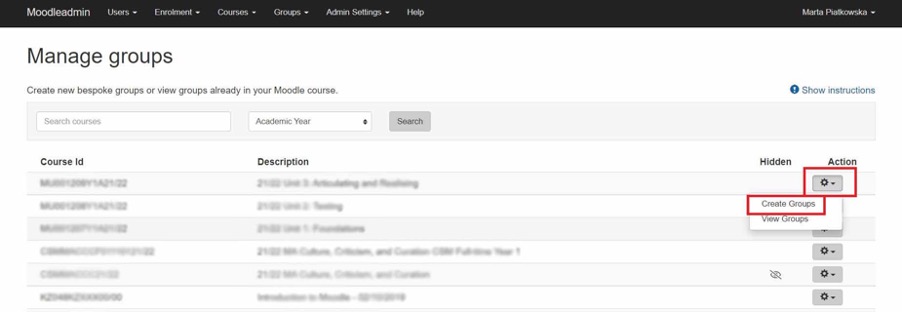
1. Click Manage groups under Groups.
2. You will see the list of created groups on the far-right click on the action icon, and select create groups.
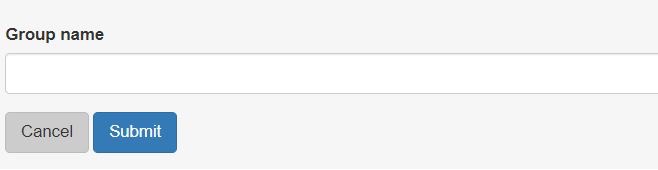
3. Type the group name in the available field, and click submit to create the group.
Batch group creation
Multiple groups can be created onto multiple courses in one go. Please be aware that it can take up to 24hrs for this to process. Follow the instructions below for batch group creation:
1. Click Batch Create Bespoke Group/Assign User under Groups.

2. Create spreadsheet in Excel with below columns:
- Column A: COURSE ID
- Column B: GROUPNAME
- Column C: USERNAME
3. Save spreadsheet as a CSV file.
Upload the spreadsheet to the form by clicking browse; once the file is added click submit.

Search user enrolment
You may want to check a user enrolment. You can do this by following these steps:
1. Click Search Users under Users
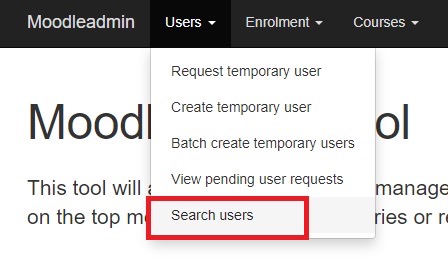
2. Enter the UAL username, student ID, email address or part of the name of the user you want to find and click Search.

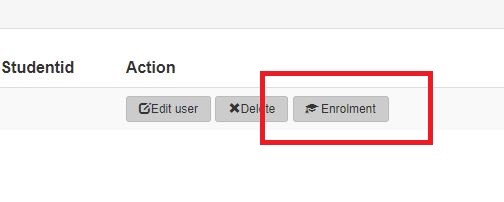
3. Click Enrolment in the Action column on the far right.
4. Select the academic year and click on the Search button.

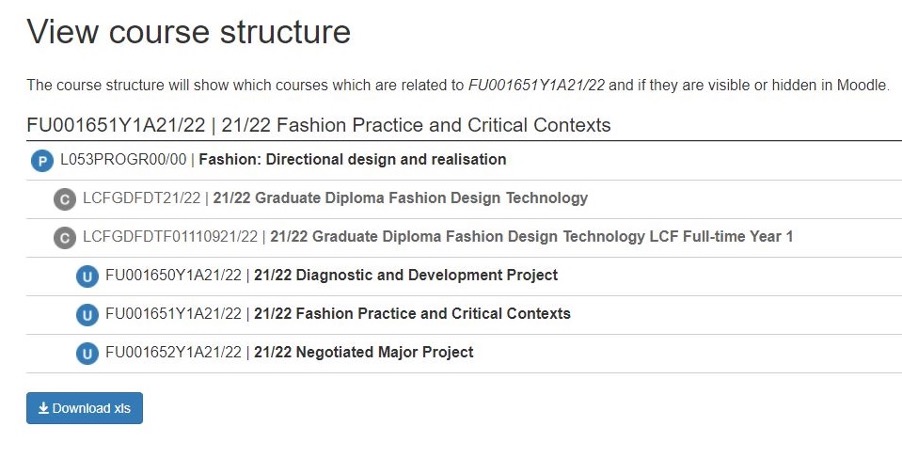
View course structure
You can view your course structure and see what programme and units are attached to that course. If you select 00/00 in the Academic year, a list of programmes that you are enrolled on will appear. You can then view the complete structure.
To view the Course Structure follow these steps:
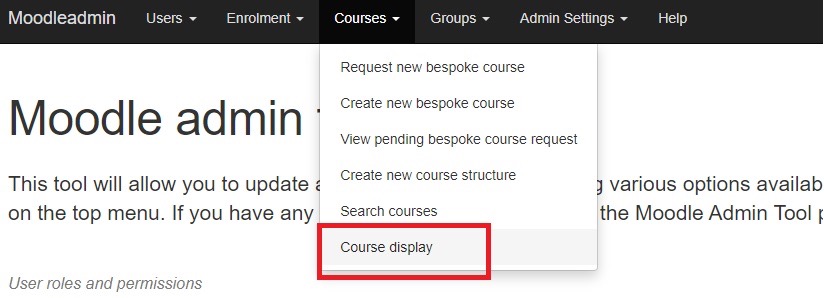
1. Click on the Course Display under Courses.
2. Click on the action icon and select View Course Structure.
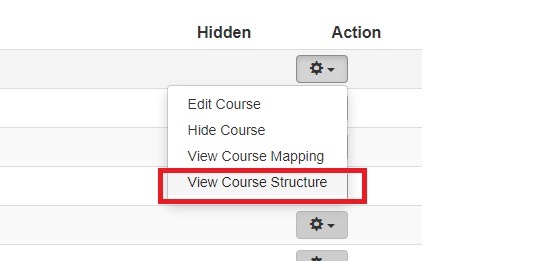
3. The full structure will appear.
View course mapping
Your course may be mapped with other courses if this was requested. You can now view what courses are mapped.
To view the Course Mapping follow these steps:
1. Click Course Display under Courses.

2. Click Action icon and select View Course Mapping.
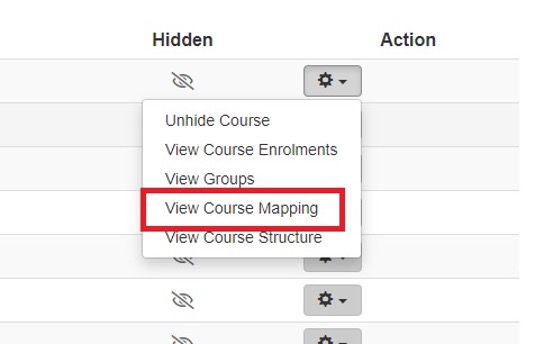
3. A list of mapped courses will appear there if the course has been mapped.
Request new bespoke course
You do not need to request a new course if you need to be enrolled and it exists on SITS. Use this to request for a bespoke new course site only.
To request a new bespoke course follow these steps:
1 .Click request new bespoke course under courses.
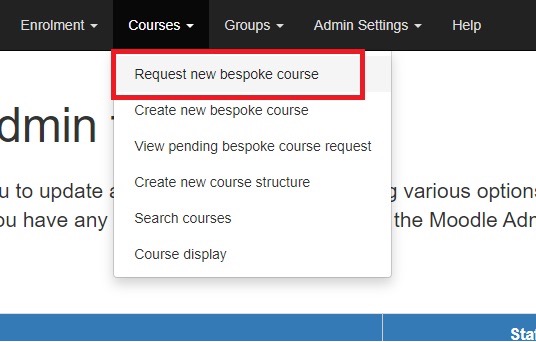
2. Fill out the form and click Submit.
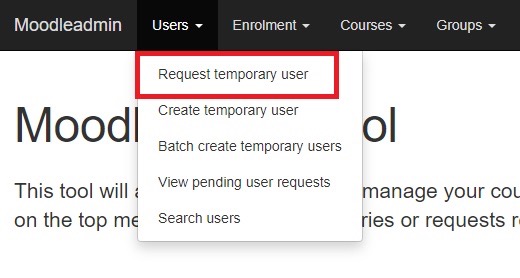
Request temporary user
You do not need to request a new user if the user already has a UAL account. Use this to request a temporary or existing user only.
To request temporary user follow these steps:
1. Click Request new user under Users.
2. Fill in all the required information and click Submit. By submitting your request, the Digital Learning Support Team gets a notification to process your request.